

This post may contain affiliate links; by clicking on and buying through these links I will earn a small commission, at no extra cost to you: helping me to keep Blind Girl Adventures running.
One of the most commonly asked questions I get is: how to apply make up as a blind person? This step-by-step guide will take you through each stage of how I apply make up as a blind person and how you can too. From moisturiser and foundation that matches your skin type, to eyeliner and eyeshadow that will make your eyes dazzle; I want you to feel confident, empowered and like you can apply your make up as a blind person on your own just like me.
Before I introduce you to how exactly to apply make up as a blind person, I want to reassure you that I’ve had years of practice, and I was lucky enough to learn how to apply make up before I went blind. I know not every blind or visually impaired person has this experience, but I know the shape of my face and have continued to practise, get sighted assistance when I needed it, and enjoyed the process of playing around with make up and the way it makes me feel.
But you’re blind why would you want to wear make up?
Make up accentuates your beauty, gives you confidence and dramatises your look. When applied correctly, make up enhances and illuminates, reduces and hides specific features and expresses your identity. It begins and ends with practice and patience, and no matter what limitations you have, having a disability should never be a reason why you do not wear make up. ❤️
How to apply your make up as a blind girl
Before you start applying make up as a blind person, you need to prep.
Base:
Exfoliate
You should exfoliate your face once a week to keep your skin soft as well as ensuring there are no dead skin cells flaking when you apply moisturiser. You can use specific scrubs that work with your skin tone. It is really important to use facial scrubs that work with your skin tone as it will help decrease skin irritation and spots.
Moisturise
Once you have exfoliated your face and neck, gently pat your face dry with a clean towel. Start by dabbing a pea-sized amount of moisturiser to your forehead, cheeks, chin and neck. Using your fingers, rub the cream into your face in circular motions, making sure to cover your eyelids, nose and cupid’s bow. (The skin between your nose and top lip.) If your face feels dry or the amount of cream used was not enough, apply more.
Additional Prep Tips:
- Create a Makeup Map: Use raised stickers or braille labels on your makeup containers to identify each product quickly.
- Organise Products Consistently: Always place your products in the same order on your makeup station to streamline the process.
- Use a Lighted Mirror: A lighted mirror with magnification can help if you have some residual vision. For those without any vision, using a consistent lighting setup can still help in feeling the consistency of your application.
- Warm-Up Products: Warm creams or foundations slightly between your fingers before application to make them easier to blend.
Face
Primer
A primer is the base for your make up. Primer has a sticking agent in it called glycerine which is the base for your make up, it ensures your make up will last all day. You can buy them as a spray or as a liquid which you apply by hand or with a brush. If you are not using a spray bottle, dot primer on your face as you would apply moisturiser. However, do not rub it fully into the skin; leave it so it feels wet and slightly sticky to touch, this is called tacky. Doing this will allow your foundation to stay in place.
Foundation
There are 3 main types of foundation; liquid, mousse and powder.
Liquid: For those with dry skin. Using the nozzle, press down once onto the back of your hand. This should be enough to cover your face and neck. Dip the tip of your foundation brush into the liquid, dot it around your face. Two dots for your forehead and cheeks and one for your nose and chin. Begin by using a stippling circular motion starting at the nose then move to the cheeks, chin and forehead. Blend out to the edges of your face using short quick strokes in the same direction. Blend the edges using the stippling motion to blend along the hairline, jawline and ears.
Mousse: Mousse foundation is for normal skin. This is a sort of thick cream and is best applied using your fingers. Using your index and middle finger, gently scoop out the foundation. Mousse spreads far so a small amount will go a long way. Dot your face using your two fingers: two dabs on the cheeks and forehead and one dab on the nose and chin. Starting from the edge of your nose, use your fingers to rub the foundation in circular motions. Using your fingers ensures you cover your face completely and smoothly. Continue with circular motions blending into your hairline, jawline and ears.
Powder: For oily or combination skin. Use a fluffy powder brush or buffing brush to apply your powder foundation. Put the brush into the powder and swirl around 2 or 3 times. Tap off the excess powder using the side of the compact. From the centre of your face, swirl the brush in circular motions. Blend outwards, if needs be count how many brush strokes you used to cover one side of your face and repeat on the other side. Blend into the hairline, jawline and ears using circular motions.
Foundation Blending Tip: Use a damp beauty sponge for liquid foundations. The sponge’s texture can help you feel where the product has been applied and where more blending is needed.
Concealer
Concealer is a way of highlighting the face and getting rid of dark circles and blemishes. For dark under eye circles, use a concealer that is 1 or 2 shades lighter than your foundation. If you have a lighter complexion, use salmon tones; for blemishes or discolouration, use a green or yellow concealer. Make sure you are using the right concealer for your skin tone.
Starting from the bridge of your nose and finishing at the outer corner of your eye, draw an upside-down triangle with the point finishing just above your lower eye socket. Blend the concealer in by gently patting the area; using your ring finger. This is your weakest finger and will not damage the delicate skin under your eyes. If you have deep set eyes, make sure to work the concealer up into the inside of your nose. This area is often missed and can leave you looking sleepy.
For a more natural daytime look and you just want to cover up your dark circles, use a lightweight concealer with a slight colour cancelling undertone. Dot the concealer and gently blend as mentioned above. You can also use a brush to apply the concealer.
Blemishes
Dab the concealer softly on the top of each blemish and around the blemish itself. Blend out softly using a clean brush or cotton bud.
Highlight and Contour
Highlight
Highlighter makes your face look brighter, more awake and gives you a glowy look. You can use this alongside contouring or add a bit of bronzer to create a shimmery effect. Draw a much smaller triangle between your brows with the base finishing where the eyebrows meet.
Draw a small line just under your eyebrow bone but above the crease in your eyelid. This gives the illusion of larger eyes.
Draw a small line in the centre of your cheek. Draw a small line along the bridge of your nose. This is where the light naturally hits your face but it also helps your nose look thinner, especially if you contour the sides of your nose. Apply a thin line starting from the centre of your ear coming down diagonally towards the centre of your eye socket. Apply a tiny amount of your highlighter to your cupid’s bow to make your lipstick look sharp.
Blusher
Blusher gives your face a healthy glow, making you look younger and more alive. There are different types of blushers that come in several bright colours. Make sure you use colours that suit your skin tone and complexion. To make your blush look most natural match the blusher with the type of foundation that you use. For example, if you use liquid foundation, use a cream blusher. There are 2 main places to apply blusher; the apples of your cheeks and your cheekbones.
Apples: To find the apples of your cheeks, smile; they are just beneath your eyes where your cheeks bulge. Good for slimmer faces for a healthy glow.
Cheekbones: They are just below the apples of your cheeks; you can find them with your fingers or a brush.
Blusher Positioning Tip: Smile and feel the bulge of your cheeks to locate the apples. Use a tapping motion with a blush brush to apply product, and then blend using a circular motion.
Eyes:
Eye shadow
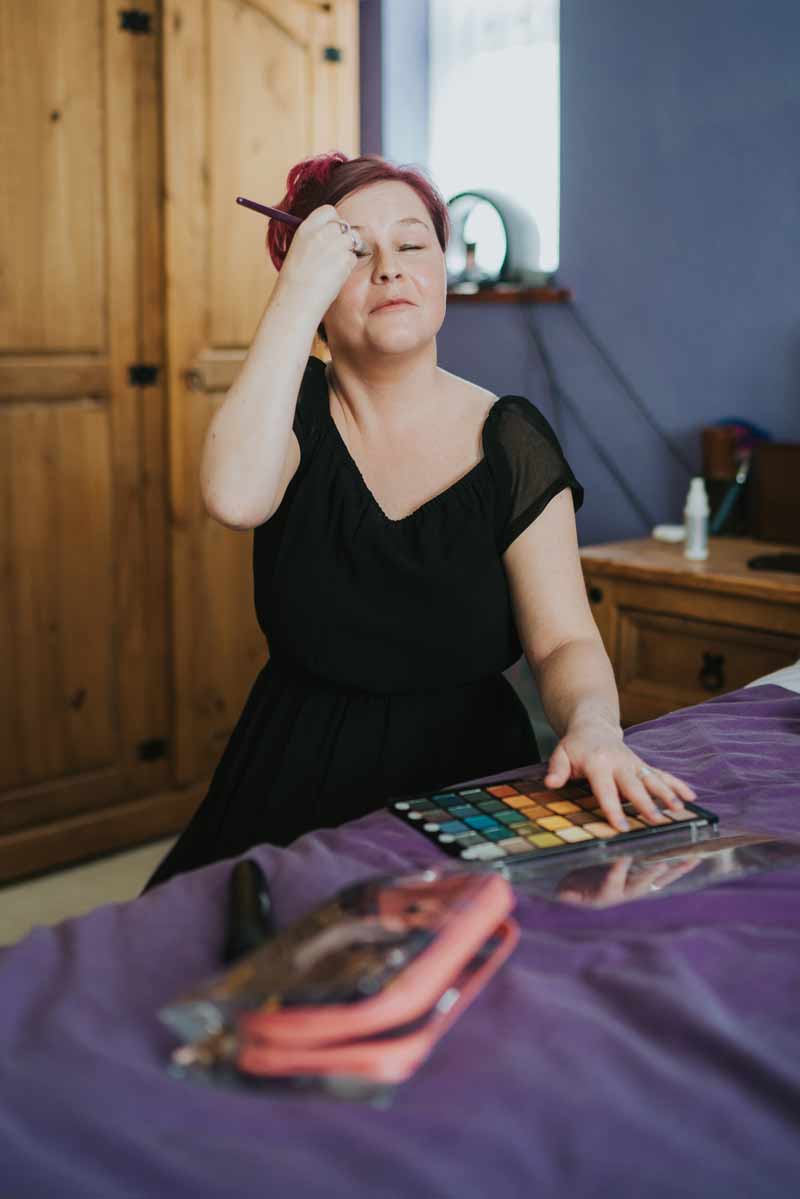
There are three main types of eye shadow; cream, loose and pressed.
Cream: These eye shadows work best as a base colour for powder eye shadow, or for solid, single-colour coverage.
Loose: These eye shadows are often where you find the most colour pigment, but can be messy and tricky to work with.
Pressed: These eye shadows are the most common type of shadow because they blend easily without being too messy. There are a selection of eye shadow brushes out there, which do different jobs for applying make up to your eyes. If you’re just getting started out with make up, I suggest getting 2 brushes that you can practice with.
- Stiff flat brush: Use this to apply eyeshadow to your entire lid. This brush is best for picking up lots of pigment and distributing it over your entire eyelid.
- Soft stiff dome brush: This is used for applying eyeshadow to your crease and blending it outwards.
Application: Starting from the outer corner of your eye, gently dab a nude colour across your lid using the stiff flat brush. Make sure to go no further than the crease of the lid. The crease is the small gap between the top of the eyeball and the bottom of your brow bone. You can use your finger or the brush to find that space. Then sweep back and forth in a gentle rainbow motion to ensure the area is covered.
For a pop of colour, add a brighter eyeshadow in the centre of your lid and blend out using soft strokes in the direction of the outer corner. Using the tip of your brush, apply a small amount of white/cream coloured shadow to the inner corner of your eye; use small soft strokes to blend out gently. This brightens your eyes considerably and gives the illusion of your eyes being bigger.
Eye Shadow Application Tip:
- Cream Shadows: These can be applied with fingers, feeling for the eyelid area and blending with a fingertip.
- Tactile Brushes: Choose brushes with distinct textures or braille labels on the handles to differentiate them.
Eyeliner
There are three types of eyeliners; pencil, gel and liquid.
Pencil: This gives your eyes a sharp and defined look. Make sure to always sharpen your pencil before applying.
Gel: Glides on easily and effortlessly. They usually come in a little pot with a brush.
Liquid: Gives your eyes that bold look. Liquid liners are used for precision; they may come in a tube with a brush, or a pot and pen style. The best way to apply any eyeliner is to: sit, place your elbow on a flat surface and rest your pinky on your cheekbone. This will keep your hand nice and steady during application.
Application: Applying eyeliner can take a lot of practice so don’t be disheartened if it’s not perfect. Start on the outer corner of your eye. Look the opposite way to the eye you are applying; for example, if you are starting with your right eye, look across to your left. This actually tightens your eyes naturally so you can get a smoother finish. Gently spot or dash along the eyeline until you reach the inner corner. Connect the dots or dash to complete the line. If you are totally blind, this method may not work for you, so I would suggest starting from the outer corner and doing small strokes until you reach the inner corner of your eye. Again, this will take a lot of practice, and do not be disheartened if it is not straight or equal. Just ask a sighted person to give you guidance on correcting it. Once you feel confident putting eyeliner on your lower lids, feel free to try applying liner on your upper lids following the same process. I would suggest keeping your eyes closed and looking down; this naturally tightens the eyelid and gives a smoother finish.
Eyeliner Guidance Tip: For upper lid eyeliner, use a guiding hand on your face or a piece of tape to create a line to follow. Alternatively, use eyeliner stamps for winged looks.
Mascara
Choosing a mascara can become a bit of a minefield, but don’t be put off; you just need to simplify what it is you want from a mascara. Do you want to volumise or lengthen your lashes? What colour do you want? There are so many colours to choose from, but a popular choice is black, or brown for those who are fair skinned. Do you sweat a lot or are you in an environment that’s damp or wet? If so, you will need a waterproof mascara. You will also need a kind and gentle make up remover, but one that can tackle your water-resistant lashes. There are a number of different brands that range in price, from drugstore to high-end. Once you have decided what type/colour you are going for, it’s time to shop around. Use the Internet, friends/family and even beauty representatives to discuss your wants and needs in a mascara.
Curl your eyelashes first. Start by curling your lashes with a lash curler. Using your thumb and forefinger, open the eyelash curlers. Keeping your eye open, place the curler at the base of your upper lashes. Close the curler gently onto your lashes, bringing your finger and thumb together, and close your eye. Hold it in place and gently tilt your wrist up so the handle is at 90° to your eye. Hold for a few seconds then gently release by pulling your thumb and forefinger apart.
Application: Before applying any eye makeup, you should use primer. Primer for your eyes is invaluable. It helps keep your eye shadow intact, so you do not need to reapply during the day. Taking the tube of mascara, swirl the wand around to coat the bristles with the mascara properly. Make sure you’re not pumping your wand into the tube repeatedly. This pushes air into the tube where bacteria contaminates the wand; this also makes the mascara clumpy, and it dries out faster. Open your eyes as wide as you can and look towards the ceiling; starting at the roots, apply the mascara with a wriggling motion. This ensures that there is more volume at the roots, and your lashes don’t feel weighed down. Place your other hand under your eye to help guide your dominant hand in, so you can find your lashes.
Mascara Technique Tip: Use a lash comb after applying mascara to avoid clumps. Also, consider a mascara shield or guard to help keep the product off your eyelids.
Eye Brows
There are 3 ways to apply make up to your eyebrows; brow mascara, eye shadow and brow pencil. You can buy eyebrow mascara from anywhere that sells make up; eyebrow mascara is essentially a miniature version of mascara for your brows. After getting rid of any excess on your wand, start from the inner corner of your brow and do short strokes through the eyebrow hair.
For those who would like to try darkening their eyebrows, but don’t yet feel confident enough using a brow mascara or pencil, you can use your eye shadow that matches the colour of your hair. To do this, dip a thin eye brush into your eye shadow palette, and tap off any excess. Starting from the inner corner of your brow, follow the shape of your natural brow using small strokes of the brush until you reach the tip.
Pencil: Hold a pencil point up and vertical against your nose to see where your eyebrow should begin. The edge of the pencil that is closer to your nose marks the line where your brow should start. Locate the ideal end point of your brow, which should be at a 45-degree angle from the outer corner of your eye. Still holding the pencil against the side of your nostril, pivot the point of the pencil away from your nose and to the outer corner of your eye. That is where the tail of your eyebrow should be. You are trying to draw what looks like many individual hairs, giving a natural feathered look.
Brow Filling Tip: Use a brow stencil as a guide for filling in brows. Alternatively, a clear brow gel can help shape and set brows if you prefer a more natural look.
Lips

There are several types of lipsticks, some include; satin/sheer, matte, liquid, cream and gloss.
Satin/Sheer: These are oil-based lipsticks that moisturise lips, but need to be reapplied often.
Matte: These are bright and bold lipsticks that give a flat and non-shiny look.
Cream: Good for women with small lips, it gives the fuller lip effect. It is not shiny but gives a creamy look.
Gloss: Gives the lips a shine and enhances the shape. Good for women who have small or thin lips.
Liquid: It contains the pigment of a lipstick and the slide and sheen of a gloss. It’s recommended that you find a lipstick that is 2 shades darker than your natural lip. To test this out, put a small amount of lipstick on your bottom lip and see if it is 2 shades darker than your top lip.
Many women wrongly believe they can’t wear red lipstick. Red lipstick is timeless and bridges age and culture. The secret to choosing the right red lip colour is in the undertones. Pink-skinned girls should opt for cherry red. Those with olive skin can wear fire-engine red. Dark skin looks great with deep reds.
Application: You should always apply lip balm before beginning your lip make up. Depending on the lipstick you are going to use, you may need to dab off the excess with a tissue. This moisturises your lips, and also acts like a primer for the lipstick.
Lip liner
Choose a nude or a colour that matches your lipstick perfectly. To get the best look, you will want to make your lips taut over your teeth and open your mouth wider than usual. Begin by making a cross on your upper lip at the point of your cupid’s bow. From there, use small thin strokes and follow the entirety of your upper lip line, making sure to go right to the corners of your mouth.
For your lower lips, start from the corner of your mouth and work your way in to the plumpest part of your lip; you can repeat this on the other side if your hand isn’t steady enough. Lip liner gives your lips definition and also stops your lipstick from running, or bleeding, as it is known.
Lipstick
To give your lips definition, repeat the cross at your cupid’s bow. Slowly blend the lipstick over your upper lip ensuring that you keep within the lip liner, and follow down to the corner of your mouth. On your lower lip, start from the corner of your mouth and blend to the centre of your lip. Rub your lips together; this makes sure your lipstick is blended equally and has a natural finish. If you feel there is too much lipstick, fold a piece of tissue in half and gently clamp your mouth around it. This will take off any excess, and is called blotting.
Lipstick Application Tip: Use a lip brush to apply lipstick. It allows for more precise application and control. Also, use a lip primer before applying lipstick to prevent feathering and enhance the longevity of the colour.
Step by Step Natural Day look
Preparation
- Apply Estée Lauder DayWear cream by dotting a small amount on your forehead, cheeks, nose, and chin.
- Gently massage into your skin using circular motions, covering your neck as well.
- Prime with Charlotte Tilbury Beautiful Skin Radiant Skin Primer
- Apply a pea-sized amount of Charlotte Tilbury Beautiful Skin Primer.
- Focus on areas where makeup tends to wear off quickly: your T-zone (forehead, nose, and chin).
- Pat and blend with your fingers for a smooth, tacky finish.
Face
- Foundation
- Use Charlotte Tilbury Beautiful Skin Foundation.
- Dispense a small amount onto the back of your hand.
- Dot the foundation on your face: forehead, cheeks, nose, and chin.
- Blend with a Real Techniques Miracle Complexion Sponge, dampened, or Real Techniques Expert Face Brush, starting from the centre of your face and working outward in circular motions. Blend up to your hairline, jawline, and neck.
- Concealer
- Apply Charlotte Tilbury Beautiful Skin Radiant Concealer.
- Dot under your eyes, focusing on any dark circles.
- Apply a small amount on blemishes or areas that need extra coverage.
- Blend by gently tapping with your ring finger or using the Real Techniques Deluxe Crease Brush.
- Bronzer
- Use Charlotte Tilbury Beautiful Skin Sun-Kissed Glow Bronzer.
- Swirl the Real Techniques Powder Brush into the product and tap off the excess.
- Apply in a ‘3’ shape: starting at your temples, sweeping under your cheekbones, and finishing along your jawline.
- Blend well to avoid harsh lines.
- Highlighter
- Apply Charlotte Tilbury Hollywood Beauty Light Wand Highlighter.
- Dab a small amount on the high points of your face: tops of your cheekbones, bridge of your nose, cupid’s bow, and just above your eyebrows.
- Blend with your fingertips or the Real Techniques Setting Brush for a subtle, luminous glow.
- Setting Powder
- Lightly dust Estée Lauder Perfecting Loose Powder over your face to set your makeup and control shine.
- Focus on your T-zone and any areas prone to oiliness using the Real Techniques Setting Brush.
Eyes
- Eyeshadow with Estée Lauder Pure Color Envy Sculpting Eyeshadow Quad
- Choose a light, neutral shade as a base colour.
- Apply with the Real Techniques Shading Brush over your entire lid, from lash line to just above the crease.
- Use a slightly darker shade in the palette for your crease. Apply with the Real Techniques Essential Crease Brush and blend in a windshield wiper motion to add subtle depth.
- Apply a shimmery or slightly lighter shade to the centre of your lid and the inner corners to brighten your eyes.
- Eyeliner
- Use Estée Lauder Double Wear Infinite Waterproof Eyeliner for a soft, natural look.
- Apply close to the upper lash line using short strokes, starting from the outer corner and working inward.
- For the lower lash line, apply gently along the waterline or just below the lashes for subtle definition.
- Mascara
- Curl your lashes with an eyelash curler if you prefer.
- Apply Estée Lauder Sumptuous Extreme Lash Multiplying Volume Mascara starting at the base of your lashes, wiggling the wand as you move towards the tips.
- Apply one to two coats, focusing on the upper lashes. You can add a light coat to the lower lashes if desired.
Lips
- Lip Liner
- If you wish, use a nude lip liner close to your natural lip colour.
- Outline your lips, starting with a cross at the cupid’s bow and following your natural lip line.
- Lipstick
- Apply Estée Lauder Pure Color Envy Sculpting Lipstick in a nude shade from their Hero Collection.
- Start at the centre of your upper lip and work outward towards each corner.
- Apply on the lower lip and blend by rubbing your lips together gently.
- Lip Gloss
- Finish with Charlotte Tilbury Lip Lustre Gloss.
- Apply a small amount to the centre of your lips for a touch of shine and a fuller appearance.
Finishing Touches
- Setting Spray
- Use Charlotte Tilbury Airbrush Flawless Setting Spray to lock in your makeup and keep it fresh throughout the day.
- Hold the bottle about 6-8 inches from your face and spray in a T and X motion.
Estée Lauder Virtual Makeup Assistant App
If you’re into makeup and looking for a fun way to try products before buying, let me introduce you to the Estée Lauder Virtual Makeup Assistant App. This handy app is designed with accessibility in mind, making it a breeze for blind and visually impaired users to experiment with makeup right from your phone – no mess, no fuss!
What’s it all about?
- Virtual Try-On: Imagine trying on makeup without actually putting it on your face. With the app’s augmented reality (AR) tech, you can do just that. Fire up your camera and see how different shades and products look on you in real-time. It’s like having a magic mirror! Plus, the app is compatible with screen readers, so you can get detailed descriptions of what each product looks like and how it will appear on your skin.
- Personalised Recommendations: Not sure what suits you? The app gets to know your preferences and suggests products that fit your style and skin tone. It’s like having your own beauty advisor in your pocket. Even better, it describes the recommended products and why they might work for you, making it easier to decide without needing to see the visuals.
- Product Info: Get the lowdown on each product – ingredients, benefits, and reviews. All the info you need is right there, fully accessible with voiceover features. This way, you can make a smart choice about what to buy, even if you’re not seeing the images.
- Interactive Tutorials: Want to up your makeup game? The app has audio versions of tutorials and tips to show you how to apply products and nail new looks. Perfect for both beginners and beauty lovers, you can follow along with voice guidance to learn new techniques.
- Skin Tone Matching: Finding the right foundation shade can be tricky, but the app can help. It scans your skin tone and suggests shades that match, providing detailed descriptions to assist you in choosing the right one.
- Save and Share: Found a look you love? Save it in the app or share it with your mates via voice commands. You can also share your favourite products and looks on social media or through messages, perfect for getting feedback and flaunting your new style.
How to Use It:
- Download the App: Grab the Estée Lauder Virtual Makeup Assistant App from the App Store or Google Play. It’s available for iOS and Android, so you’re covered.
- Set Up Your Profile: Create a profile when you open the app. You might need to upload a photo or use your camera for the virtual try-on. If you prefer, you can skip this and use the descriptive features to explore products.
- Virtual Try-On:
- Live Mode: Use the camera for a real-time try-on session. The app overlays makeup on your face as you move. It’s great for getting a feel of different looks, and the descriptions help you know what’s happening.
- Photo Mode: Prefer to use a photo? Upload one, and the app will work its magic. Again, voiceover support will guide you through the process.
- Explore Products: Browse through different makeup categories like lipsticks, foundations, and eyeshadows. Use the accessible features to hear descriptions and details about each product, making it easier to choose what’s right for you.
- Personalised Suggestions: As you try on more products or browse, the app will start recommending others you might like. You’ll get audio explanations of why these products are suggested, which helps in making an informed choice.
- Buy Your Faves: Found something you can’t live without? You can buy it directly through the app using voice commands or screen reader support, or save it to your wishlist for later.
- Learn New Tricks: Check out the audio tutorials and tips to learn new makeup techniques. Whether it’s a bold eye or a natural glow, the voice-guided lessons make it accessible and easy to follow.
Why You’ll Love It:
- Convenient: Play around with different looks without leaving your house.
- Confident Choices: Get detailed descriptions and voice guidance to help you choose products before you buy.
- Informed Decisions: All the product details are at your fingertips, read out by the app, making shopping a breeze.
- Accessible: Perfect if you can’t get to a store or prefer the ease of shopping online, with full voiceover and screen reader support to guide you through every step.
I hope this post about how to apply make up as a blind person has been useful, giving you basic knowledge of how I apply makeup. If you enjoyed this post and would like to read any more tips or guides, please just let me know 🙂
A massive thank you to my gorgeous sister, who not only is my very own make up artist, but helped me write this guide, ensuring I explained it in an easy-to-follow manner 🙂 Love you bro xxx
For more similar articles, check out my recommendations below:

Excellent content for beauty care women.. I flow your idea.Thank’s
I love your tips – thanks for sharing. I do wear make-up, but haven’t got the hang of eye liner yet. What is your favourite type of liner to use?
Pingback: Why Phones are good For Blind People #GoRoam - Thinking Out Loud
It’s inspiring to see the beauty industry becoming more inclusive and recognizing that everyone deserves to feel confident and beautiful.